Friday, May 9, 2014

The focus is changing


By the first of May, I had wanted to be able to call a wrap on the salon wood work, and for the most part, it is complete enough. Doors have to be built, as do shelves for some cabinets and the bookcase, but those items are not going to slow down my progress.

All the water supply and waste line plumbing is complete for the day head and the galley sink.  I'm ready for the galley counter tops, which will happen as funds improve this Spring. For all practical purposes, I'm ready for finish flooring and appliances in the salon and wheel house. The flooring will be installed  closer to launch as I don't want to have to protect it.

I got a little more precise on sizing the air conditioner for the wheel house and salon, and feel comfortable that one unit will do the job. This marine air conditioner will reside in the lazzarette, and one six inch, insulated duct, will feed both rooms. The duct runs under the Settee, behind the notched range cabinet, through another cabinet, then under the wheel house Settee. Believing that return air was important to making the system work better, I  managed to squeeze in a six inch return air duct ( non insulated silver pipe). In a perfect world, I would have preferred to have the return air inlet as high as possible and further away from the air register. The best place I could make work for the return air inlet was the back rest in the settee bench seat.

The salon settee was more or less assembling parts I had fabricated when the wheel house was in the barn. The dimensions changed a bit on the salon between my mock up and the real world. Because of this the salon table does not fit down within the bench seats any more as I lost one and a half inch. My original plan was to have the table collapse flush with the bench seats to  make the mattress more comfortable. This set up still makes for a queen size bed for guests, and as of right now, I'm leaving it as is. A few strategic cushions along with a queen size air mattress will work fine and our guests will not know the difference.

Little things make a big difference regarding tables and seats, and in the case of the salon settee table, the misplaced 1.5" makes the table more comfortable to sit at. My curves by design in the table had made the table feel a fuzz to far away from the bench, but with the change in dimensions, it now feels good.

The propane range is installed, and I did fire it up as all the gas connections are made. I am making one change to the gas line by doing away with the manual valve I have in the cabin and installing a solenoid valve. To close the cabin valve, one must now lift off the top of the range to access the valve.
A solenoid valve with a switch above the range will make life easier. The valve is normally closed, and it need 12 volts to open it.

Another small detail that's complete and makes a big difference is having the valance installed at the wall/ceiling wire chase. Having all the visible aspects of construction hidden behind finish material is puts a smile on my face.

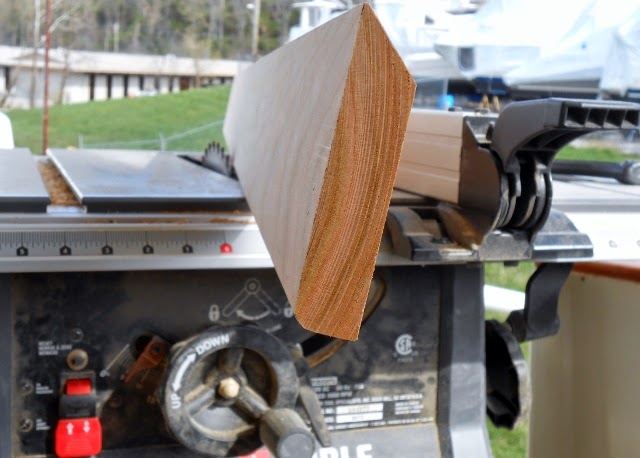
The half bath sink vanity is built along with the cabinet above the sink and another cabinet above the toilet. Doors still have to be built, but again those will not slow me down or take up space with waiting to be used lumber. All the doors left to be built will be built at the barn where I have a joiner, shaper and a high quality table saw ( the barn saw has zero run out along with a super flat, heavy cast iron bed).


 For sure, I would have like to be at this stage last February, but when I step back and look at what I've gotten finished since landing the super structure last November, I'm feeling pretty good.

Cheers

Saturday, April 26, 2014

The salon shrank

My goal was to  have all the wood work in the salon completed by the end of April, and while I'm going to be close, I won't be finished in a week. I'll be close, but not finished.

This weekend I brought in the cabinets I built last year and got them fitted. The range cabinet along with the 36" sink base and the 18" drawer unit are in their final resting spots, and things are looking good.

With the cabinets in place, I'm able to finalize the air conditioning ducts that feed the salon and wheel house. Along with those two six inch ducts, a six inch return air line is getting installed in the salon. Getting these ducts installed required giving up some real estate, but I've had my plan in my head for a year now, and I think it will work. The only less than ideal strategy is that I don't have a return air line to the wheel house. The wheel house is open to the salon, so I'm hoping the air will get pushed back in to the salon's cold air return.

The other issue that's been thrown in this mix is how I'm ventilating the lazzarette ( the room under the aft deck, aft of the engine room). The air conditioning unit for the salon and wheel house resides in the lazzarette. I had originally vented this room with two three inch ducts that ran up and out the salon aft bulkhead. This was really a poor design on my part, along with having too small of vents. As it turns out, I had to cannibalize those two vents to get some plumbing in to the lazzarette, so on to plan B. I'm talking about all of this because this is going to impact the forced air cooling of the salon and wheel house, and this is what I 'm dealing with today. It's really not that big of a deal as I'm going to locate some 6" cowl vents and use the plasma cutter and hog out two holes in the aft lazzarette bulkhead three feet above the swim platform. This will be adequate ventilation for the lazzarette helping get rid of the  heat from the AC unit, which will help with the cold air return..... air in needs air out.

Before the cabinets can be landed for good, the range needs to be located off of the starboard wall. Again, no bid deal, but the gas connection needs to be landed  once I haul the range to the boat precisely locate it.

Unlike a  house, where things are plumb, level, and square, a boat with its descending and ascending angles and dangles, everything needs to hit a specific location.  In a  house, if one needs to frame in a square chase in the corner of a ceiling to route some plumbing or HVAC, it's no big deal as the space's are huge, and likewise easy to square things to each other. A boat on the other hand is 30 times more robust than a house yet her spaces are delicate and need to be treated that way.

I can now say that I'm closing in on completing the salon. All the major components are in their places and I'm totally happy how nice the space feels. Two people can easily navigate without tripping over each other and no area of the salon has me feeling cramped or claustrophobic. With the tinted windows open, the breeze moves through nicely, and there's plenty of light. With the tinted windows closed, the sun getting through and washing over the darkening Cherry wood , gives the room a warm and rich feel. The table saw has moved to the aft deck along with the saw horse cutting station. For the first time, the dust of a build is on the retreat.

Cheers,


Sunday, April 13, 2014

Closing in on completing the salon

I'm making steady time in the salon, and it's close to getting finished. All the sheathing is finished, all the windows and doors are cased, and the half bath framing is finished. All the cabinets, including the settee drawer unit are finished and waiting in the shop. The settee bench's are going to be site built, so that job has to be completed but I think I'm going to get some urethane on the walls and trim before I bring in the drawer unit and the rest of the cabinets.

Once the day head was built, I looked at the space created between the day head and the aft salon wall. There's a boatload of plumbing and fuel tank related parts in the starboard aft corner of the salon, so building an access panel for future access to these parts was necessary. Since I was looking at that corner, I decided I wanted to house the stereo in that same access panel. Once I had the stereo in my mind, I started looking at a book shelf, and once I got the book shelf was stuck in my head, I realized we  had no place to stash garbage. Designing by need, or seat of ones pants, is my MO, so now the small planned access panel morphed into a multi-use, built in cabinet with doors, shelves, and wiring . Going with a larger inside dimension of a built in book case, I decided to make the interior 13" deep, which gives an overall depth including the face frame of 13 3/4". The built in is 41" tall.

With the now 13 3/4" built in planned, I looked at the remaining space  between the built in and the day head and was happy to find I still  had 6'7" of space.... plenty of room for two comfy reclining chairs.... I think. Measuring some  chairs at  home had me feeling good about the space, but a field trip to the furniture store was in need, and once that was completed, we settled on a reclining love seat with a console between the chairs ( chairs recline independently). The recliner can be as close to one inch off of the back wall vs 8" for reclining chairs, and measures 6' wide. I've been on too many boats that don't really pay much attention to comfortable seating, and I don't want this boat to be one of those.

The built in lays out with the garbage closet, with a door, on the end,  and the stereo above it. There will be two or three DC receptacles next to the stereo for charging phones or other devices. The cabinet top, which is 14 1/4" deep, is large enough for a lamp, along with being able to lay IPods or IPads can on the cabinet top so they can plug in to the stereo. The book case is is in the center, and will probably  have three shelves, possibly four. Next to the book case is the plumbing access panel on the bottom and another cabinet with door above that. The holding tank vent exits through the roof of the boat in this corner along with sharing space with the water feeds for the day head, and washer/dryer. The garbage bin should be closer to the galley, but it is what it is, and it's not that far of a walk to reach it.

Because the aft wall is only 2 1/2" thick, I'll be fabricating a trim piece to apply for these two windows, so no sill. The other six windows in the salon received a sill, jambs, and casing. The casings are 1/2" thick, but the head casing is 3/4" thick. I did this so I could butt the side casings in to the head casing and have a 1/4" reveal. The joint looks good as I rounded over the head casing on the side casing edge. On the top of the head casing, I cut a 45 degree bevel to give the trim that's going to hide the access chase's some place to sit. This detail works nice as the chase cover has a firm place to land and only will require a few screws through the board in to the ceiling to  hold it fast. Because the board lays in the 45 degree bevel, it also gives a nice tight fitting joint with no fussy fitting. Holding the head casing down 1/2" gives a nice place to hide the rail that the window curtain will slide in.  This detail worked out nice and the best part was how easy it was to fabricate and how tight fitting it is going to look.

There's still a day's work left before I'm ready to put some finish on salon, but like the post title say's, I'm close. Once there's three coats on the walls, I'm going to glue down some floor underlay and bring in the remaining cabinets. With the rest of the cabinets installed, the the six inch air conditioning duct can be finalized along with  installing the already built settee parts.

Wrapping up the bulk of the wood work by April's end is within reach, but things could creep into May. What's important is that the table saw is moving out of the salon, and I'm getting ready to start eyeballing some mechanical work, which I"m ready to dive in to.

Cheers


Tuesday, April 1, 2014

Salon

Spring has finally sprung in our part of the world, and this salon sheathing boat builder couldn't be happier. The weather last week was a little raw with some rain snow mix, and lows in the 20's, but today skies were clear blue with the thermometer hitting 80 F. This might sound foolish, but the downside to spring arriving is that my phone is ringing off the hook, and for all practical purposes, I'm booked solid with work until at least September. Being booked so far in advanced is a nice problem to have, but getting the boat in the water this season is important to me so, work and the build are going to have to get along .

I hit the salon pretty hard this weekend past, and I have it sheathed. The rain/snow storm we had on Friday gave me a day on board to finalize the water line runs for the washer, the 1/2 bath, and the galley sink. I also was able finish the behind the walls AC and DC wire runs along with finishing the hard piping for the waste lines.

All the waste lines on board are 1 1/2" SCH 40 rigid PVC. I have a little bit of flexible PVC, but not much. The galley sink gravity flows either to the aft holding tank or overboard via a Y valve. The 1/2 bath sink also gravity flows to the aft holding tank or overboard. The 1/2 bath toilet is a macerator, and that is forced to the holding tank via an 1 1/2" SCH 40 rigid PVC. Below deck, in the cabins, is another toilet that is a composter. In case the composting unit does not suit our needs, I have another 1 1/2" forced main run from the below deck head to the rear  holding tank via the starboard salon wall. So before I could sheath the salon, I had to finish these pipe runs along with the galley sink pipe run that runs behind the port side salon wall. On all the forced pipe runs ( a pump is doing the work), pressure fittings have to be used. On any gravity line, one is best to use DWV fittings. DWV stand for drain, waste, vent.  DWV fittings have a smaller shoulder to glue, but have a more gravity friendly flow line.

I had originally planned on running the water lines for the salon macerator toilet, sink, and washer dryer behind the salon walls, but that space was getting crowded so I chose to run these lines in the wall/ceiling chase.

The 1/2 bath is one of those deals where some compromising had to be made. I had the 1/2 bath mocked up in the shop when I built the super structure, and knew it was going to be tight. Now that I have it framed in real time, I'm happy with  how roomy it is. The width of the 1/2 bath at the toilet is 30". The 1/2 bath tapers to an 20"w x 18"d square cube where the sink resides, so the 20" wide entrance door will be in the taper between the two above measurements. My  biggest concern was the width of the passage between the 1/2 bath and the wheel house steps as one heads below deck. The width of this passage ended up being 21", but to make it feel better, I think I'll radius the treads on the wheel house steps, or maybe clip off the corners. The wheel house steps are pretty wide @ 26", so there's plenty of room to work with. This picture shows the door layout line along with the temporary construction steps leading up to the wheel house.

The 1/2 bath was built out of 1/2" cherry ply. The corners are joined with laminated posts that I plowed 1/2" dado's in to. To finish the outside edge of the outside corner post I cut a substantial chamfer. It's hard to see the chamfer in unfinished wood, but once a finish is applied, the chamfer really pops and gives some nice detail.

Another weekend, and I'm fairly confident I'll be ready to start getting some finish on the salon. I also feel pretty good that I'll have the table saw out of the salon by the end of April with 95% of the wood work complete. With this wood working schedule now attainable, I have May and June to work on mechanical's , which gives us a July launch date. If I was a patient guy, I'd spend another  year getting her 100% finished, then launch her. Maybe giving  her another year is the right choice, but I'm ready to spend some evenings on board doing what this project was meant to do . When she hits the water in late June or July, I"m going to guess her at 95% complete. Hopefully we'll get  her to 98% complete.

Cheers


Monday, March 24, 2014

Leaving the wheel house

The heavy lifting in the wheel house is complete, so it's time to move onward in to the salon. The last big job finished in the wheel house was to mount the settee table and the large counter top.

Most every time I show up to work on the boat, I have a small armload of parts or material hauled from the storehouse in the barn. Sunday, before I applied the last coat of urethane on the counter top, I took a couple of hours to clean and re organize some space. Just about every cabin is overflowing with material, parts and tools. But since the salon is the next and last really big wood working project, I had to make room in there. Still to be completed in the salon before the room can be sheathed is to run water lines for the fresh water flush toilet and associated sink along with turning the three 1 1/2" waste lines down in to the lazarette. A few wires  need to be pulled along with deciding on where to mount the stereo, but no real big work has to be completed before sheathing can begin.

The electrical panel in the wheel house is fully functioning, but still needs some work from the engine room to call it a wrap. I have the 80 amp three battery bank charger installed and connected to the house battery bank, but since the engine and generator batteries are not installed, those two connections need to be made. I've decided upon a location for the battery switch's so I'm able to move forward with fabricating the starter cables along with fabricating the battery switch panel. Because I'm sort of bouncing between the engine room and the wheel house before going full tilt boogie in the salon, I need to get the battery box built in the engine room. I keep having moments where I a tool could be laid across the battery posts or something metal like a square could fall and land on the posts, so I need to get the box finished to protect the batteries. Having the DC system fully functioning is one more item I want off the list before I can begin sheathing the salon. 

The salon is a fairly straight forward sheathing job as all of the time consuming wood working details have already been dealt with. The exhaust stack is covered. The up and down bound stairs are sheathed and trimmed. The fridge and microwave nook are installed. Given that the tricky stuff is finished, I'm going to go out on a limb and say I'll have the room sheathed by the end of April. A lofty goal, but one that needs to be attained.

Cheers


Sunday, March 9, 2014

Getting closer

This is the first weekend  I've been able to get in to the boat yard now that they're back on summer hours, and I feel like I'm starting to get somewhere. I got a fair amount accomplished this weekend, and am almost at the point in the wheel house where my attentions can move elsewhere.


The first item off the list was to do the instrument panel over. I had edge glued some boards together for the first instrument panel, and I was not real happy with how it looked. The edge glued panel was to wide, and was already showing signs of movement. The layout of the gauges was messed up, and once I saw a crack in the wood develop, that's all the motivation I needed to saw it up and toss it in the stove.  I used cherry plywood for the new panel, and edge glued some stock to it to hide the cut ends and give it a bread board edge look. Because of ply being more stable, I was able to get a little tighter on the instrument layout, and ended up having quite a bit of room left over after installing three of my panels.  Yet to be installed is a chart plotter, a floscan gauge, a depth finder, and a bank of switches in the available space I have left. If I end up being unhappy with the cherry plywood instrument panel, I'm going to go with black plastic laminate, although I  think this panel will work.

The next order of business was to install the door that house's the electrical distribution panel and the panel itself. I built the door large enough to be able to add sub panels or another panel below the main panel. The door is my basic style and rail door using a 1/4" cherry plywood panel, and cutting all the parts on my wood shaper.  Because the door is so large, three hinges were required to hang the door. I can tell you without a doubt,  that having the electric  panel hinged has already paid off in spades in regard to how easy it is to work on. It really is nice being able to quickly open the panel, have the back of it right in your face, and sit on a bucket and land wires.

With the panel now mounted, and having all the parts to land some wires, getting things hot through the panel became my next task. The boat is laid out with all the AC conductors coming from the port side, and all the DC conductors coming up the starboard side. I built a bulkhead perpendicular to the panel door around the fresh air duct to give myself a place to land all of the AC and DC conductors. The bulkhead was built on the hinge side of the panel door to keep accessibility to a maximum. All the conductors land on either a buss bar or a terminal strip depending on their function. Commons and bonding go to a buss, loads to a terminal.  From the buss bars or terminal strips, the wire makes the jump from the panel using a flexible, tinned marine wire. Once I had the wires straightened out, and the buss bars and terminal strips laid out, things started to fall in to place and the work moved at an easy quick pace. My thought is that by having buss bars and terminal strips to land all the wires , adding, moving, trouble shooting, upgrading, and  maintaining all our circuits should be relatively simple.

The panel is built for two AC shore power sources having two AC buss's. The panel also can be fed via our generator or an inverter along with the DC source. Because of wanting to feed one buss with inverter loads, and only having one shore power cord, I used some jumper wires on my load terminal strip to hot three circuits using two breakers. I have all the lights hot, all my receptacles, and my air compressor.  The jumper wires are no big deal and are a common method, but I am pretty sure ABYC allows for no more than four wires per terminal. It's big time sweet being able to see ( via the panel gauges) how much voltage is coming aboard, and how many amps are being used.

Now that the panel is at the point that it can be used and easily finished as the project develops, I decided now was the time to get some more heavy work finished with pulling the battery cables from the engine room to the wheel house. The 12 volt house bank sits in the engine room and with the DC panel in the wheel house, a heavy cable was needed. Over the summer I had purchased two 100' rolls of 2/00 cable. Buying 200' of seems like a lot, but I still have to fabricate the leads for the three battery banks, land the starter cables. I'm of the school that it's cheaper to buy 10' too much vs being 2' short.  I spent the extra money and purchased battery cable vs the more common welding cable. Welding cable is good stuff, but battery cable is  better, and it's a fact that fittings crimp better on battery cable. From the wheel house to the engine room, I have three 1" flexible conduits, and three 3/4" flexible conduits installed. Deciding to save these conduits for future use I hole sawed a new three inch hole in the floor next the the conduit, then installed a grommet to protect the new cables. The battery cables are ready to be landed on the panel, but I need to do some work in the engine room to land the cables to the batteries.

Since I was in the cable pulling mood, I went ahead and pulled the cables from the wheel house to the engine room for the main engine and the generator. I use a 9/12 UF ( nine conductors, 12 gauge, direct bury) wire for work often, and I have quite a bit of scrap lengths at the shop, so that's the wire that got used for this job. The main engine uses 10 wires, so I taped a red 10 gauge wire to the 9/12 for the battery conductor on the main engine. The generator only needs seven wires, but since the 9/12 is 12 gauge wire, and I wanted a 10 gauge for that battery line, more red # 10 got taped to this conductor  too. Wanting to be able to stay on task, I landed those two conductors on terminal strips under the instrument panel so once I run down a few more parts, connecting the main engine panel and the generator panel will be quick and easy. Using terminal strips in this way will also make adding another helm for a possible future fly bridge will be more easy. Because the generator only needs seven wires, and I pulled 10, I now have enough wires already run to the engine room for the bow thruster solenoid valve, and that's a nice added bonus, and one less thing I'll have to deal with.

The wheel house is starting to look good, and I can see the day soon approaching when I can jump back in the salon and start sheathing. This nice bit of wheel house work I did this weekend found me burning through 50 -  #10-12 heat shrink forked terminal ends like it was nothing. So before I can really call it a done deal, I'm going to have to source some more parts. I'm going to look at it a hard this week, but I do believe I can now install the counter top and get some color and finish on the last bit of wood.

Cheers


Tuesday, March 4, 2014

More wheel house

I should probably start by saying I'm going to stop crying about the winter that won't end. I know it's close to giving up the beast, but after the 6" storm we had two days ago, and lows in the single digit this week, it's fighting to the bitter end. The high today was around 26 degree F, but with the sun gathering strength, the cold air temperature can no longer sustain the snow, and it's quickly receding. Given the air temperature is still below freezing cold, having the boat facing south, along with the strengthening sun, heats the inside of the boat up quickly, and I really don't have to run the heater at all.

I finished trimming the windows, and also got some color on the wood. The window trim is basically a house style detail being a 1/2" x 2 3/4" casing, a 3/4" x 2 1/4" stool, and a 1/2" x 2 3/4" bonnet under the stool. All the reveals are a 1/4".  It's a simple look, but I think it's legitimate.  

Some more progress has been made in the wheel house, and I'm inching up on getting the wood work completed. The layout was finalized, and more compromises were made. We were pretty dead set on having a 240 volt clothes drying machine and a 120 volt clothes washer, but in the end, having two units just took up too much space. In the space where the clothes dryer was going to go, I built a base cabinet with two large  drawers, and two doors underneath. Because the drawers are so wide, I used 3/8 plywood for the bottoms vs the usual 1/4". I'm planning on the drawers being used for paper charts and other things navigation.  The drawer fronts are not installed yet as I just  fitted the boxes in place.
 
Just aft of the new base cabinet is the opening for the compact LG washer/dryer combo unit. Out of all the units I looked at on line, the LG units have the best, most consistent reviews. I'm a little leery of it's ability to dry clothes with only 120 volts, so I have it in the back of my head that a decent working clothes line might be in order... probably something on the roof running off of the mast.

The large opening starboard of the instrument dash area is where the electrical distribution panel  is going to go. I had some sort of cut twice/measure once thing going on and screwed up the door that houses the electric panel. I found out this mistake today as I was fitting all the shiny parts I've made in the last week.

I have the wheel house counter top fabricated and dry fitted in place, but not not yet installed. Before the top gets installed,  I need to land all the wires on the bulkhead behind the distribution panel door. I used THHN for the primary wiring behind the walls, and will land all that on terminal strips. From the terminal strips, to the distribution panel, I'm using a flexible, tinned, marine wire. I have about 90% of the boat wire pulled to the area under the dash, and landing it with the top off is going to be  huge vs lying on my back. I realize I'll still be doing some wiring while laying down, but I want to get as much done while it's relatively accessible.

While I was fabricating in the barn last week, I decided to make the panel that finishes covering the dry exhaust/intake stack. Because the stack is such a large fixture, I decided to make this panel a raised panel. A large, flat piece of plywood just didn't feel right. The cherry veneer plywood is for sure nice material, but in my opinion, is a little too perfect. The air dried cherry I am using oozes character, and really puts the plywood to shame in regard to interest.  Being in the center of the room and such a visual element, this large raised panel looks spot on.

Here's to the coming Spring.

Cheers