
The basic layout of the cabin area below is as follows: Down four steps from the salon above. Once at the bottom of the steps, you can either turn left through a door and get to the master cabin, or go straight through another door to get to the guest cabin dressing room/hallway. One has to go through this area to get to the guest cabin/kids cabin located in the forward area of the hull. Each cabin has a door to access the common bathroom where the shower and toilet is located. Each cabin ( master and guest) has it's own sink. The engine room is accessed from the master cabin through a water tight steel door.
Standing in the guest cabin dressing room, one will find a large sink base with storage underneath, four wall mounted cabinets, and a bench seat with storage underneath it. There will be two ceiling mounted DC lights, and one ceiling mounted AC light with all lights being controlled by switches on the wall. There is also a decent amount of wall space available to have some hanging storage without impacting ones ability to walk through the space.
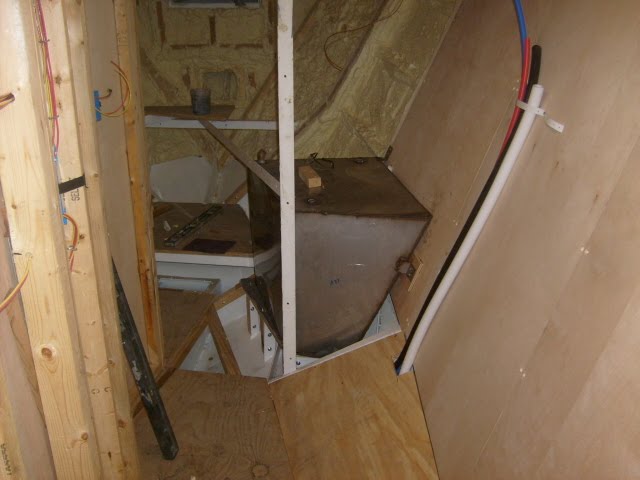
Because of my wish filled thinking regarding shower sump pumps, I had to re think how I was going to hold the gray water from the shower and cabin sinks. I decided to add a holding tank, and the most logical place for it was under one of the bunks against the dressing room bulkhead. I was going to buy a plastic tank, but since I had enough stainless plate left over from the water tank construction I decided to fabricate my own and save some cash. The tank ended up with 47 gallons of capacity.
Under the sink base in the dressing room is some of the gray water plumbing. The through hull fitting you see is above the water line. When we have to hold our gray water, the bl
 ue valve will be shut and the black valve will be open. This will direct the water to the main sump which will then direct the water to the 47 gallon holding tank I just built. When we can discharge gray water, the blue valve will be open, the black valve will be closed, and the shower sump will discharge overboard via the black pipe when the sump selector valve is in that mode. It's a pretty simple set up albeit a bit on the bulky side, but I made everything from parts found in the shop and did not have to depart with any cash. The elbow on he end of the manifold is for the guest cabin dressing room sink once I get that sink installed.
I built four more cabinets to fill up the wall in this room, and stopped them well short of the port light. One of the cabinets will be the medicine cabinet above the sink, while the other three will be general storage. The cabinets are 12 inches deep at the base, and about 18" deep at the top. I'm also using t
 hese cabinets as the chase for the air conditioning duct that will feed the guest/kids cabin. That duct will be a four inch flexible pipe.
In order to give one as much privacy as possible, there will be a door between the dressing room and the bunk room. The door will be 20" wide.
I had enough room to create a bench in the dressing room so people could sit down while they were getting dressed. I installed a piano hinge on the lid of the bench so the bench could double as a locker for more storage.
The room is a fuzz narrow, but I'm able to easily navigate through it without bumping my knees or having to turn the least bit sideways. I think this space will be an important part of the boat in regard to helping all on board with privacy, and a sense of having ones own space. To be honest, this is a very comfortable room even though it's function is mostly utilitarian.
I have six doors to build for this room, and one more sheet of plywood to install on the partition between the master cabin and this space. I also have to plug all the screw holes, sand everything, and get a coat or two of finish on the wood.
 Once those jobs are finished, I'm ready to start work on the sleeping room and its four bunks. Once the doors are installed and some finish on the wood, I'll post some more pics.


Hi,
ReplyDeleteDo you have a name yet for the boat? We want to follow your story at TrawlerBlogs.com but we need a name :(
No name just yet. You could tag it conall's boat build. Since it's a work in progress, we're still kicking around names. I dropped by trawler blogs.com and liked what I saw. Thanks
ReplyDeleteThanks Conall. Let us know when you get a name. Or for now we'll go with what you recommended.
ReplyDelete