Wednesday, May 8, 2013

Porch ceiling, soffit, and some wiring

Historically speaking, this is always a bad time of year for me. Work is back with a vengeance, but funds have yet to start flowing back my way. I'm almost booked up for the rest of the year, and everyone I know that does my type of work is for sure not complaining about the amount of work out there. Because cash flow is not working so well right now, I've had to start using material I've purchased last summer to keep things moving forward.

My latest project has been getting the aft deck ceiling installed, installing the salon soffit, the port, starboard, and aft steaming navigation lights, the aft deck ceiling lights, along with the salon soffit lights. I also wired the salon ceiling for lights as I intend to install the ceiling in the salon before we head to the launch site.

The aft deck ceiling was built using BC plywood which I painted. Because I wanted to be able to remove the ceiling with not to much trouble, I used stainless screws with finish washers to fasten the ceiling. Instead of hiding the joints in the ceiling, I covered them with battens pinned in place with some stainless brads. Because I have so much Cherry lumber in the barn, I made the battens out of Cherry and left the bright with a few coats of urethane. We'll see how the bright battens suit us against the painted ceiling. 

Every light on the boat is LED. Last summer I purchased 40, seven watt 12 volt can lights. I purchased direct from factory in China, and have to say I'm pleased with the quality of the light. The lights are aluminum with an aluminum heat sink. All the machining is top notch, and the penetrations from the wiring are epoxy sealed along with having the wiring tinned. I purchased 40 lights so I could get to a certain discount level, but I also wanted to have spares on board for replacements. I checked every light when they showed up and every light did what it was supposed to do. To date, I have about seven lights working on board now, and I'm totally impressed with how bright they are, how cool they stay, and how much electricity they don't use.

For lighting the aft deck ceiling, I installed two of the seven watt can lights. Because of how the ceiling is framed, I can easily add another light using a fish tape in the future, but I doubt I'll need it as the two lights I have installed give plenty of light.

I installed a LED work light on the aft deck to illuminate the swim platform. I will also have two work lights in the mast along with one more work light on the bill of the wheel house. The work light for the swim platform is switched from inside the salon door.

The salon soffit overhangs the salon walls about six inches. I decided to install a one watt LED light over each of the three windows. These lights are blue, and my intent was for accent. I think the lights will look pretty sharp while we're at anchor or at a harbor.

I do  have a design complaint regarding the aft deck ceiling. The trim piece of metal that makes up the salon soffit is about 4" tall. As the trim turns to wrap around the aft deck ceiling, it gets reduced in height to about 3". I don't know why this happens and it could be a flaw in the cut file. I saw this and knew it was going to be an issue when I was framing the super structure but I chose to do nothing about it. What this caused me to do was force the plywood ceiling up at the rear of the aft deck so that the plywood still remained above the drip edge of the trim  piece. The plywood ceiling has a  subtle curve upwards over it's last 18" aft.  Not only does the plywood need to be above the drip edge, it needs to be above it about 3/8" in order to keep the reveal constant around the aft deck ceiling. The other big issue of having the plywood protected by the trim piece is to keep roof water from rolling around and getting to the edge of the plywood. It really did not look that  noticeable until I installed the cherry battens. I can tell you it's a big job to fix and I doubt I"m going to fix it. It really doesn't bother me that much.  

There is really no reason why I can't install ( other than lack of funds) the ceiling in the salon now. Because it's going to go much faster while in the shop, I went ahead and made all the preparations to install the ceiling. The first thing I did regarding this was to make sure all the timber frames were installed to catch the bead boards that will make the ceiling. Once the framing was complete, I located all the lights and light switch locations. The basic layout is that as one enters the salon door, you'll turn on six can lights from a switch by the door. Another switch in the galley will turn on three lights; one above the sink, one above the range, and another above the fridge. There will be another light in the half  bath.

Since I was wiring the ceilings, I decided to go ahead and run the wiring  feeding the switches, and also installed a switch for the aft deck work light, the aft deck ceiling light, and the salon ceiling lights. The soffit lights will be switched from the wheel house and the feed has not been established.

The wheel house will also be switched from a wall, but I want to have some red lights in there along with a few of my already purchased can lights. So given that, I'll probably have two switches for the wheel house ceiling lights. 

All my wiring connections were made using heat shrink crimp type connectors. For larger connections where more than two wires joined, I used potted wire nuts. Some purists might frown on a potted wire nut in a marine environment, but I have 100% confidence in them. I've been using potted wire nuts for assembling splice boxes in septic tanks and sewage lift stations for 25 years. I have yet to see corrosion in those wire nuts be and issue and I can assure you that ocean air is no where near as corrosive as the inside of a septic tank. Potted wire  nuts are pricey, but you get what you pay for and they're worth the money.

My immediate goal is to complete the salon ceiling, and build the salon door. I  have to be able to lock the boat up once at the launch site, so a proper salon door is a must. The salon door is going to be wood, and the wheel house door is going to be aluminum.

A large piece of wiring and carpentry has now been checked off of my list. Having good reliable lighting is a must and it feels good to have this part of the project working and off the list. Once the boat is at the launch site, the soffit I just finished will be about 16' in the air, and since I have  no side decks I would have had to use scaffold  to do this work. It was a good thing to be able to quickly do it in the shop while it was only 7' off the ground. 

Cheers

Sunday, April 7, 2013

A little progress

Spring is here for sure and I do have a little progress to report. I've not made as much headway as I would have like to in the last few weeks, but like the song says, a  little bit is better than nada.

I think I've taken the salon as far as I can in regards to building cabinets and furniture. The latest project completed was fabricating the end caps for the dinette benches, and a small table that will sit between the two comfy chairs we will have. I think the small table will house  the am/fm stereo for the salon, and has a drawer for stashing the remote control for the TV. The end caps for the bench, while  not a job, required a bit of time. Because of the 16" width, the end caps needed to be glued up. I had to decide  how I wanted to have the bench seat riser connect to the end cap and chose a dado which had to be plowed in to the end cap. I did not want to see end grain wood on the end caps, so I fabricated a cap that had a dado plowed in to it so it could slip over the top of the end cap. While I was building the end caps for the salon dinette, I also did the same thing for the wheel house bench seating.


I took a look at doing some work in the wheel house, but felt that it is going to be better waiting until the super structure is landed on the hull in a few months. The wheel house floor has a decent camber to it, and also falls off grade forward to aft. I don't think the super structure is going to rack when we lift it, but I'm not 100% sure it won't, and there's no point fastening any finish ply to the front of the wheel house if there's a chance it could move. I did figure out the camber of the wheel  house floor, and fabricated the face frame for the bench seat drawer unit. I gave myself plenty of room to scribe the face frame to the floor and still have an inch of face frame left on the bottom once it was fit. Because I not had the face frame built, I had the drawer size in front of me, so I decided to build the three drawers that will go in the assembly.  The far port side opening in the face frame is for the air conditioner vent that supplies the wheel house.

Because I could possibly be drilling holes in the wheel house face frame and the four end caps for the bench seats, I did not put any finish on these parts. All these little odds and ends parts I"m making will make assembly at the launch site go much more quickly .


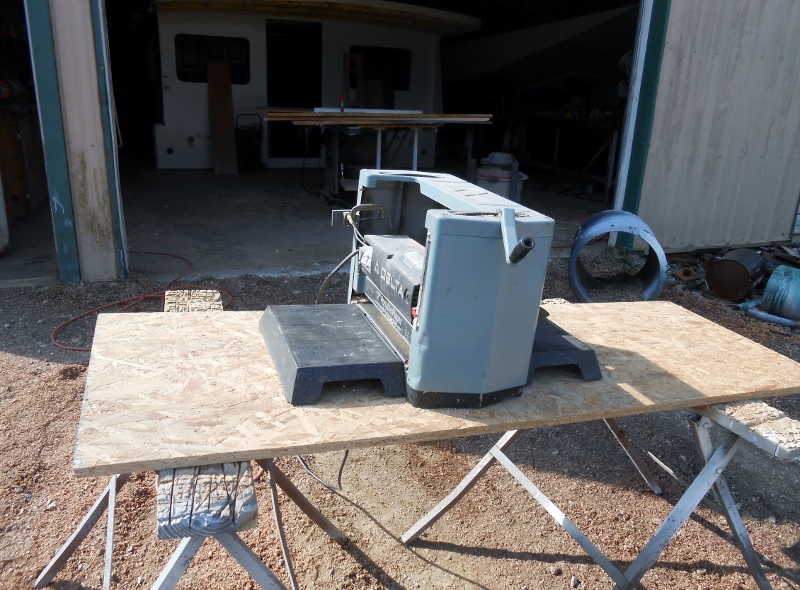
For the last four or five years, I've been threatening myself to go and buy a real planer to build this boat. The current planer I  have is a  15 year old Delta 12" thickness planer that is really undersized for how much lumber I'm running through it. I really need a 15", 240 volt machine with a three knife cutter  head. The Delta machine has seen better days, but seems to still get the job done. Having sharp knives in the machine is the only way the it has a fighting chance of keeping up with what I ask it to do. When I first bought the machine, I had a local sharpening guy do the knife sharpening work for me. The problem I had with the professional sharpening is that the blades seemed to dull quickly. The edge they produced, while sharp, did not have enough meat on the back side, so the cutting edge would fail, then dull, and begin to leave ridges on the work. As long as the knives do not have a severe nick in them, I prefer to sharpen them myself. To sharpen my jointer and planer knives, I use a jig cut in to a piece of hardwood to  hold the knife at the correct angle. The sharpening media I use is 300 grit, 2" wide adhesive sand paper wrapped around a hard wood block. Before I put the knife in the holding jig, I flatten the back of he knife using the 300 grit block. With the blades held firmly at the correct angle and the jig clamped in the vise, not much time is needed to revive the edge.  Once the edge looks good and all the shiny spots have been taken off of the edge, I'll hone it with the same block using 600 grit self adhesive paper. Sharp tools are one of my pet peeves, and having them makes the work much more enjoyable and consistent.

I still have a long list of things I want to get finished before I move her out of the barn namely: Aft deck ceiling including ceiling lights, rear steamer light, rear work lights. Paint aft deck ceiling. Pull ceiling light wiring in salon and wheel house and locate switch's. Water line from salon sink to salon 1/2 bath. Salon and wheel house doors.  Hydraulic lines from engine room to anchor winch. Hydraulic lines from engine room to bow thruster. Hydraulic reservoir install. Weld vent in salon roof for gray water holding tank that I forgot. One more coat of urethane and caulk undersides of bulwark cap. Weld "D" rings to  hull to chain hull down to dolly. This is pretty  much my punch list, and I'm going to try to stick to it before she leaves the barn. Hopefully, the list won't grow to much larger and I'll have her ready to move by early Summer or late Spring. The boat yard I'm bringing her to is packed full right now but after the first of May, it will begin to clear out.

Cheers


Thursday, March 7, 2013

Dinette


Winter is hanging on to our part of the world and the paying work I have going on or scheduled has been halted.  This makes things good for working on the boat but not so good for paying bills. My guilt level stays low as I'm able to get work done on the boat with lumber that cost me next to nothing. All the lumber I"m using on the interior was harvested from my acreage and milled over a year ago. This is the only way I can afford to do this since Cherry lumber in my part of the world is selling for $7.00 per board foot.

With the galley now finished I've turned my attention to the dinette. The dinette is on the port side between the galley and the aft bulkhead. The dinette table will collapse down and convert to a double berth. The double berth will be about 6'3' long and 44" wide.

I raised the dinette platform off of the salon floor eight inches. Eight inches is right on the border on being an uncomfortable step regarding height. The platform was raised so that the space under the platform could be used for drawers, and a chase for the duct work feeding the salon and the wheel house. The bench's for the dinette will also double as lockers for the boat's life jackets. The port side fuel fill and vent connections will also happen under the dinette bench seat.

The plywood seats you see are not the finished seats rather they are framing grade plywood I used to mock up the area. I started with rule of thumb measurements to see how things felt, and planned on adjusting as I went. The only adjustment I made was to angle the bench seat riser inward two inches to give ones feet more room. That two inches makes a huge difference in how comfortable the seats feel. Until the boat build, I've never been one to mock t hings up, but to tell you the truth, mocking things up has been pretty useful. Before I committed to cutting the dinette table, I wanted to make sure everything worked and felt good.  The finished elevation of the seats is 17" above the platform and the width of the seat is 16". We're planning on seat cushions, so I'm going to lower the seat two inches to compensate for the foam. As you move forward, the boat gets wider so the dinette seats follow this flare as does the dinette table.

The only real bug in the dinette was the collapsible table support. I went with a commercially made pedestal that is a half way decent unit. The problem was that the pedestal is that the stanchion finishes out 6" below the deck  when the table is collapsed down. In order to make that work, I had to alter the center drawer. I kicked it around for a few days and decided the best fix was to header off the back of the drawer to allow the stanchion to slip passed it. By simply re shaping the drawer, I did not  have to mess with the glides, the drawer unit bulkhead, and the drawer unit framing. I was also able to keep the table pedestal in the  center of the dinette, which was important for stability. It was a easy solution that no one will notice.


Most of the finish wood in the salon is Cherry. I had been digging through my stash of Walnut when building the island for the  house, and came across two boards that were 1 1/2" thick x 10" wide. They were choice old growth Walnut with almost no sapwood. The boards were jointed straight, and edged glued with #2 biscuits for reinforcing. Personally, I think biscuits add a lot of strength to this joint, and are quick and easy to install.The Walnut boards have been sticker ed in the loft for about 12 years, and because they were old growth and flat when dried, they required minimal planing, and I was able to get a finished thickness of 1 3/8". On the last boat we owned, the dinette table was cut square and was a fuzz uncomfortable in regard to  how close the table edge was to the seat edge. I decided to curve three sides of the table in two inches to give one some relief, and also give the top a little interest. Now that it's all said and done, I like the curve, but I could have made it less slight... say about an inch. I'll have to do something in the seat riser for the top to land on for creating the berth. Since I was giving the table some interest with the curves, I decided to take it a little further and  inlay a band of Tiger Maple around the edge. The Tiger Maple band is 1/4" wide x 3/16 deep. The Tiger maple is bright white, and helps breaks up the size of the top. I was also going to inlay in a compass rose in the center of the top, but decided I had done enough and wanted to avoid making things look busy. I might do a compass rose in the wheel house table. The pictures really don't do the top much justice as the contrast between the Maple and Walnut is pretty choice. What really makes it interesting is the brilliant white radial bands of the Tiger maple and how it pops with the gloss finish. It's a pretty piece. Deciding how to treat the table edge had me thinking on it for a day or two. I had the choice of lightly easing the edge with sanding, leaving the edge sharp, or rounding it over with the router. I decided to round it over with a 3/8 bit, and am  happy with how it feels and looks. Because the top is 1 3/8" thick, the 3/8" round over does not overwhelm the edge. 

The table top on the pedestal is pretty stable, but it could be  more so. Now that the measurements, elevations, and overall sizing is good, I can commit to building some finished seats. I still have to give myself wiggle room as some measurements are going to change once I land the super structure to the hull. I'm not talking anything drastic, but a 1/4 or 3/8 is no out of the question. The order of assemble at the launch site once she's ready to accept all these cabinets will be to install the dinette first. I built myself in plenty of room as you head forward in to the galley and can adjust as I need in this area.

I'm not burned out on case work just yet, but I think I'm going to run some wires for lights and switches before I tackle some of the wheelhouse cabinet work. Now that I have the salon darn near figured out and finished, locating the various lights, and receptacles is getting easier.


 Cheers

Sunday, March 3, 2013

Drawers

Drawers are a lot of work. On more than one occasions I've heard others say that a way to gauge the quality of work  being done on a project is to look at doors, drawers and stairs. Making drawers, doors and stairs look good requires some patience.

All the drawers in the salon are built using half blind dovetails. I used a Porter Cable dovetail jig, and can't really complain about what a nice job these jigs do. The drawer box was built with half blind dovetails on the front, and a dado on the back.The bottom of the drawer is also let  in to the sides with a dado. The actual drawer front, the part one sees when the drawer is closed, is screwed to the drawer box after the drawer is fit in to the opening. Another way to do this would be to use a rabbeted half blind dovetail drawer, which dovetails the drawer finished front the the drawer sides. The rabbeted  half blind joint is more precise, and a joint I really did not feel like messing with. I like the flexibility of being able to adjust the drawer front by using the half blind joint.

I used some of my Cherry to build the drawer  half blind drawer front. For the sides, I used Ash which I have had in the barn loft for twelve or so years. The back of the drawer is 3/4" Birch plywood. The bottom of the drawers is 1/4" Oak or Birch plywood ( whatever I had in the  barn). I planed the Ash sides to 5/8" thick just because I like the look the thinner stock gives, and I made the Cherry front 3/4". The decorative front of the drawers is also 3/4" Cherry  that I rounded over the edge with a 3/8 round over bit.

The Porter Cable dovetail jig is a nice tool. The drawers work best if you keep the height of the drawers in one inch increments the add a 1/4". So drawers with heights of 3 1/4", 4 1/4", 5 1/4"  and so on work the best. It's not a deal killing act if one doesn't build to these dimensions, it's just that the half pins look best and centered by sticking to the whole plus 1/4". Success of building a drawer is good layout, and making sure all your cuts are perfectly square and all stock is jointed straight and planed flat. I have a half way decent miter saw, but I still prefer to make all my critical cuts on the table saw using stops to make sure all my stock is exactly the same length. There's no mistaking that the table saw is the work horse of the shop.

One of the center pieces of the Salon is the dinette. The dinette has four drawers under it and also has the chase way for the wheel house air conditioning duct and the salon air conditioning duct. In order to keep things moving along, I decided to build the dinette drawer unit as a modular piece. Because I am going to be  moving the drawer unit to the launch site, I had to be able to keep it square. In order to do this I let in a diagonal brace gluing and screwing it in place. The hardware I'm using won't work right unless everything is square and true.

Like most everything I've been doing on the build, things are much easier since she's still in the barn. Having all the cabinet and case work now complete, while it took a few weeks in the barn, saved me a couple of months by not doing it at the launch site. I think my modular plan is going to work.

Now that the drawers, and cabinets are completely finished, the next item on the to do list is the dinette itself. The dinette table is going to collapse down to make a bed, and will be large enough for two to sleep in.

Another builder I follow is working on his building the sail rig of his 75' schooner named Phoenix. He has a lot of nice colloquialisms, and one that fits what I'm doing is " this is not a how to do this, rather how I did it".
This for sure describes what I have happening on my boat building adventure, and I think I'll be quoting James again in he future if it's OK with James.

Cheers    

Sunday, February 24, 2013

More cabinet work

The galley cabinet doors are finished along with the cabinet where the LP range resides. All the cabinet case work is finished and all that is left is to urethane the four drawers for the galley cabinets.

 Progress seems to have slowed down a bit as I've been doing a few projects around the house. One larger project was building an Island for our Kitchen. I had some nice Walnut stashed in the loft of the barn and just had enough to get the island built. The business end of the island has two doors and two drawers on it and give us some much needed cabinet space. We're looking for a remnant piece of granite for the top, so for the time being the plywood you see is doing fine.

The roof of the salon has about a five degree arch to it so I decided to build the doors to match the arch. I  built the cabinet box's square, but did not want the step look of square doors against the arched ceiling, so I decided to match the ceiling with the doors. The top style of the cabinet frame, was made four inches vs my standard two inches and scribed to the proposed ceiling. I should say at this time that I'm giving myself plenty of a fudge factor since I"m building all this without having finished walls and ceilings in place. In critical areas, I 'm building in large over hangs and fillers that I can scribe, trim and fit once she's at the launch site. It's kind of tough to do things this way, but it's how it has to be done. The bottom of the doors are square while the top of the doors  has a five degree angle on them. The five degree angle is also in the top of the raised panel. It sounds pretty easy, but it gave me a little of a fit. The angle changes just a fuzz as you move port, so I had to do some adjusting. Adjusting means throwing cut pieces in the wood stove and starting over. Once I had all the doors fabricated and I was fitting them to the ceiling, I dropped one of the doors on the concrete slab and gave the wood stove some more fuel. Replacing the door should have been a smooth operation given I built it once before, and still had my cut sheet. I must have forgot the measure twice and cut once thing, because I built the door backwards and ended up feeding the wood stove some more. I'm really in no hurry, and while it's a frustrating thing turning a simple job in to a dragged out comedy, it really doesn't bother me too much and I've given up getting pissed off. It's all over now, and I do think it looks pretty good. The bead board ceiling is going to be 5/8" thick and when I open the new doors it looks like I'm going to have about 3/8" clearance between the doors and the ceiling. It should look sweet against the painted ceiling.

The range cabinet is another build that became a little bigger than I had planned. Because I had to center the range in the galley, and me wanting a certain amount of galley space, I had to use 7" fillers on either side of the range. Not wanting to waste that space, I built two doors to go in each of the filler space. The doors are on their side, and while only four inches wide, one will be used for a spice rack, and one will be used to hang long utensils. I used some 1/4" aluminum round stock to created the keeper for the pull out shelves. Because I used raised panel doors on the cabinets to either side of the range cabinet, I had to do some careful layout when building the pull out shelves. One inch is about the minimum I like to go for a frame, so I was able to hold the pull out shelf an inch away from the range. This gives  me about 5/16 of clearance as the pull out shelve pulls past the raised panel door on t he sink base to the left, and the door/drawer cabinet to the right.   I had to  notch the back of the range cabinet so I could get a six inch air conditioning duct from the lazzarette to the wheel house, and this cut out encroaches in to the space under the range. Because I framed in the duct cut out,  I was able to create a larger pull out drawer under the range, and the smaller space  under that drawer ( where the ac duct notch is ) became a cubby accessed by a drawer front that flips down. I'm also  happy with how this looks and how I was able to snatch some usable space out of the range cabinet.

I've been toying around with how to build the drawers for the galley, salon, and wheel house and have decided on dove tails. All the drawers in the cabins below use a sliding dove tail on the drawer side that slides in to a dove tail dado on the drawer front. The sliding  dove tail is a good joint, but I like the look of the half  blind dove tail joint. For the four galley drawers, I'm going to  use a half blind dove tail and screw a drawer front on the that box. All the drawers are going to be solid wood  sides and fronts, with a plywood bottom and a plywood back. The back and bottom will fit in to a dado. The salon drawers under the salon table settee will also be half blinds with drawer fronts. All of these drawers will be overlays. I'm thinking about going with a different look in the wheel house and maybe use a flush drawer with a through dove tail for the joints. I'm getting a little ahead of myself with the wheel house thoughts, but it's not too far down the list. A guestimated drawer count for what I'm going to be building is four in the galley, seven in the salon, and eight or nine in the wheel house. When it's all said and done, I think I'll be pushing over 50 drawers on board. It's starting to feel like a floating cabinet.

I should be posting some drawer construction in a week or so as I've already started building them. 

Cheers    

Monday, January 28, 2013

I started the galley cabinets

Now that the window frames are ready for windows, the next big wood working project is the galley cabinets. I have quite a few more cabinets to build on board, but the galley is the heart of the salon and a good place to start.


The galley layout is basically a "U" shape. On the bulkhead wall that separates the raised pilot house from the salon is where the refrigerator will reside next to the engine room exhaust/intake chimney. Above the refrigerator is a 30" wall cabinet that will house a microwave oven. Next to the microwave oven will be a 36" double door wall cabinet with shelves. Below the 36" wall cabinet is a 15" base cabinet with a drawer and door. On the port wall of the layout is where the LP range will reside. I built a cabinet for the range to sit upon, and also notched out the back of the cabinet so my 6" air conditioning duct for the wheel house can sneak past. I was also able to get two small shelves in the range cabinet that will have a  single door front over. Because of needing space to get the fridge in and out of the galley, I  had to build two 7" fillers along each side of the range. Along with the range and the two 7" filler pieces, the width of the galley from the fridge to the other cabinets is 32".  I'm going to build two drawers on their side in those fillers ( 4" drawers) for a spice rack on one side and hanging utensils on the other. I'll get in to more detail once I start finishing the cabinets. Continuing around the "U", is where the sink base will reside. I built a 36" sink base to accommodate a home size double bowl sink. It was important to us to have a large sink and it's a detail all will appreciate. Next to the sink base is an 18" base cabinet with three large drawers.


All the cabinets and wood work on board the boat is American Black Cherry. Trees for the lumber were cut off of my property, and milled by neighbor Carl Claypool and his dog peckerwood.

My method of building the galley cabinets are to build a box, attach a face frame, then build style and rail raised panel doors. On other parts of the boat, I saved time,  money, and space by making some of the cabinets "built in" which  utilizes part of the hull as the cabinet "box". Because the wheel house and salon are still sitting in my barn, building cabinets as boxes is the only practical method.

Each box is built from 3/4" birch plywood. There is only one place where the side of any cabinet will be visible, and that side was made with 3/4" cherry plywood. The backs of the all the cabinets are 1/4' plywood, and I added a 3/4" rail to the top of the base units back, and to the top and bottom of the wall units back. The extra rail is to give me something more substantial than 1/4" material for mounting the units. The tops and bottoms of any cabinet is also 3/4" plywood let into a dado in the sides. The wall units have a top and a bottom, the base units only have a bottom as the counter will make the top.  I rabbeted the sides to accept the 1/4" back.

The face frames are solid cherry and have a width of 2". All the face frames were built using the Kreg pocket screw gizmo. I can't say enough good things about this method of building face frames, and it's become my number one choice when applicable.

The doors are the style and rail method and because I want a nice looking job, I decided to use a raised panel. I went with a traditional raised panel which is a 15 degree angle. I have an ogee cutter for my shaper, but I wanted something more in tune with what one would find on an older boat, and the 15 degree raised panel suited my thought. I cut the style, rails, and raised panels on my old Delta shaper.  I've posted about the shaper before, and I'll again say that caution is for sure the preferred attitude to have when using this tool. When the panel raising bit that weighs about a pound  is spinning at 10,000 rpm, and you need  hearing protection from the noise it make, a serious amount of respect quickly builds. When raising the panels, I use the table saw and remove a lot of the waste before starting with the shaper. I take light cuts, and always do the end grain first. The end grain is the hardest material to cut, and in case I have some chipping or a minor blow out, the next cut going with the grain will usually fix any end grain issues. The cutter is carbide, and sharpened to 600 grit so it's nice and sharp. The shaper has a great device to raise and lower the bit, and along with the micro adjustments on the fence, the level of precision is fantastic. When finished with shaping the panel, I sand it to 220, and give it a light coat of Cherry stain. Having some color on the panel before assembly will help prevent seeing a line at the style and rail joint once the panel starts moving with seasonal humidity and the wood naturally darkens.  I expect the Cherry wood to darken five or ten shades once it starts seeing some sun. The natural darkening is one reason I like Cherry.

I've been mocking up some of the structure in the salon. For the galley, I mocked up the bulkhead wall, and the engine room chimney. I also mocked up the ceiling above the fridge. The finished ceiling is going to be a bead board which is 5/8" thick. Using 1/4" plywood for the ceiling is not ideal and makes it hard to get a good scribe joint against the face frame. I left an inch of material to scribe for final fit against the real ceiling.  I'm being pretty accurate, but I'm also giving myself lots of wiggle room in regard to extending face frames past the cabinet boxes in critical areas for plenty of room to scribe and fit to the finished wall and ceiling material once those are installed.  Mocking up is not something I've done in the past, but It's the only way I can do this job. I've found a few issues during the mock up and was able to easily change some things that would have been a pain to do later down the road.

I could have purchased a set of rub collars for the shaper and made the raised panels fit the curve of the ceiling. I'm going to deal with the curved ceiling regarding the door fit by making the top rail of the doors fit the ceiling curve. I'll make the upper rail four inches vs my standard two inches and scribe it to fit the ceiling. The other option is to leave the door square and live with the stepped look of the square door against the camber of the ceiling. The different thickness of the curved top rail vs the square lower rail might make it look odd, but I think the overall look will be ok. We'll see how it looks in about a week.  The three doors you see in the picture above are two for the sink base, and one for the 15" base cabinet next to the fridge.

There is much more to post about the cabinet build, and as I get further along I'll add more detail.

Cheers

Sunday, January 20, 2013

Window frames are ready for windows

The window frames are finished and another job has  made it off of  my list.

Once I had all the Cherry window frames installed, I wanted to make sure all the window trim rings fit as they should. I'm glad I did this, because I had to trim some of the frames to allow the trim ring to fit with the 1/8" clearance the manufacturer recommends. The window frames, like most other things, took up a lot more time than I would have estimated. I was also surprised that building the frames consumed a sheet and a half of Cherry veneer plywood. Only one frame made it in to the wood stove, so there was really no waste. The last time I bought Cherry veneer plywood was when I was building the cabins below decks two winters ago. I guess technology has allowed the plywood manufacturers to alter the veneer as this veneer is extremely thin. I don't even want to guess what fraction of an inch is, but one has to be very careful as sanding through it is not to hard to do. Because I was joining frames together using biscuits, it was critical that the frame faces were perfectly flush so that a light sanding with 220 grit would bring the two surfaces perfectly fair.

 
My system of using blocks, while a pain to install, looks like it's going to work out good. If I were to do it over again, I would probably glue the blocks to the hull sheathing vs bolting them in place as I did. I had the chance to glue some blocks in place, and also the chance to remove some glued in place blocks. The glued in place blocks I did remove, split away in the wood instead of the glue failing at the hull sheathing. I'd have no problem in the future of relying on a glue to metal joint in this application. Before gluing a block to the hull sheathing, I would recommend one scuffs the primer to give the glue something to grab. The biggest reason I wanted to use blocking was have a situation where I have no metal at all not covered with foam insulation. I have two small areas inside the super structure where the foam broke away from the flange due to my aggressive foam trimming, but that will easily be repaired when I foam the hull to super structure joint this spring. The only other place I have bare metal not foamed is the thickness of the hull skin at the window and door rough opening. Once the window is installed, it will be no bid deal at all to go back with a can of foam and seal this joint.

 The foam guy did a pretty good job overall, but the thickness of the foam was inconsistent at the window opening. While installing the windows, I'll have a roll of fiberglass insulation on hand so we can fill this gap. The metal is not exposed, but as you can see from the picture, the thickness varies. I want the maximum amount of insulation for a comfortable boat as much as I want to eliminate any chance of condensation.

I was going to temporally install the windows to see how they looked, but I soon realized that the more I handled them and had them out of the crate, the more they could get damaged. I had toyed with the idea of permanently installing the windows while the super structure is in the barn, but my gut tells me the move to the launch site and the work to land the super structure could jeopardize the windows.

The next project is building the cabinets for the galley. I'm well into the cabinet job and am happy with the size and layout of the galley.


Cheers