Wednesday, March 9, 2011

Composting Toilet


As of press time, deciding the toilet type was one of the more thought provoking decisions made on the boat build to date. Every boat I've been involved with has had a macerating type toilet. Every boat owner I know has a macerating type toilet. Every boat owner in my neck of the woods whom I spoke with regarding composting toilets thought this to be a foolish idea ( I guess old habits are hard to dump). It is for all of the reasons I just stated, and a few ideas of my own, that I decide to utilize composting toilets on the trawler.

I'm not going to go into a ton of detail on this toilet, but I will say that it is a simple device that is well thought out in regard to use and maintenance. I was a little nervous about going this route, but after installing the unit and giving it the twice over evil eye, I'm feeling pretty confident that this composting toilet is going to make life on board more simple.

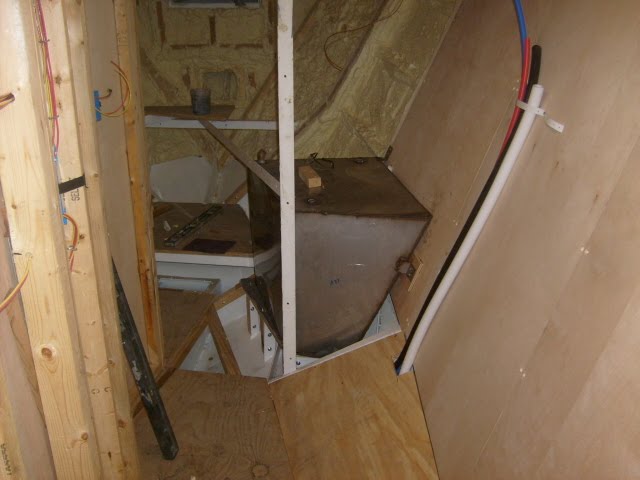
I went ahead and installed and finished the toilet area of the bathroom so I could have a working toilet while I build the boat. The toilet has a 12 volt fan built in to power air into the composting bin. The fan only pulls a few mill amps of current, so I decided to power it off of the circuit for the shower sump. I installed a simple set of 12 volt thumb screws in a wall box to make the connection to power the fan. This is a fast, simple connection that is reliable and looks pretty decent. Before I sheathed the walls, I installed a 1 1/2" PVC vent line to vent the composting bin. The vent line will eventually exit the front wall of the wheel house. After one drops a bomb in the composting bin, a stainless steel handle needs to be cranked a few times to mix the material in with the peat composting media. The handle can be used on either side of the unit, but since we are all right handed, I used the right side. Under normal conditions, the unit can handle about 80 events ( gotta love being politically correct while trying to talk about defecating). The science behind this is simple: keep the solids and liquid separate, keep oxygen moving in all the right places, good ventilation and moist composting media. This thing will work.

I'm pretty much sold on this idea, but I still installed a 1 1/2" schedule 40 PVC transport line from the bathroom to the main holding tank of the boat. Getting that line installed was a pretty simple thing, and because I used rigid PVC, the line will last as long as I'm on this world. If the composting toilet fails, I got a huge piece of infrastructure in place to use a different style head.

I read every post on every boat cruising forum I could find regarding composting toilets. I could not find one negative thing written about this style toilet. All post I've read by hard core cruisers and live a boards all agree that those who switch to this style head do not switch back to the macerating, vacuum, or manual style heads along with the associated holding tanks. A large part of my excavating business is installing septic systems form homes, and I'm pretty happy that I won't have the mini version of a septic tank on the boat. I now have two gray water tanks for a total capacity of 135 gallons, and 8 fresh water tanks for a total capacity of 360 gallons. It feels good knowing that none of the precious fresh water will be needed for flushing.

As the hour meter starts to tick and time begins to accumulate on the composting toilet, I'll start giving some updates on the performance. A few of you out there might be thinking that I'm jumping the gun by getting a working toilet on board at this stage in the game, but the truth is that I'm psyched to have another place to sit and ponder.

Sunday, March 6, 2011

Guest cabin dressing room update #2


The last few weeks have found me getting the Carver boat ready for it's new owner so not much has been getting done on the boat build. Now that the carver is finished and out of the shop, I'm back working on the boat build.

I received the new sink so I was able to complete the installation of the top, the sink, and the faucet. All the cabin plumbing connections are now complete. If I had the pressure pump and a couple of days work, I'd be able to use the sinks.

I installed a new valve for the through hull fitting under the guest cabin sink. The valve I had originally installed was a cheap gate valve that was probably doomed for failure. I installed a more corrosion resistant ball valve in place of the gate valve and hopefully saved myself a future headache. I had read on another forum that gate valves have no place on boats, and I agree.

The through hull fitting under this sink is the only through hull fitting for the cabins sinks and shower. This through hull fitting is a stainless steel piece of pipe, welded in to the hull that is threaded on the inboard end. The ball valve threads on to the pipe, and that is my basic through hull fitting. If gray water needs to be held, the red handled ball valve is shut, the black handled ball valve is opened, and the sump pump selector valve is moved to the holding tank position, then all the gray water goes to the holding tank. If we can discharge gray water, the red handled ball valve is opened, the black handled ball valve is closed, and the sump selector valve is moved to the discharge position so all gray water is either pumped or gravity flow overboard.

The galley sink, the clothes washing machine, and the half bath above will have another holding tank and one through hull fitting to deal with that gray water.

Thursday, February 10, 2011

Guest cabin dressing room update


The six cabinet doors are finished and I have two coats of Urethane on all the wood in the guest cabin dressing room. I also have the sink base top completed, but it's not installed yet as I changed my mind on the sink. I had purchased a square stainless steel sink for this room, but because the top is an odd shape, I could not get the sink installed in such a way that it looked aesthetically pleasing. A square sink on a trapezoid top just doesn't look right, so I decided to sell the square sink, and buy a round sink. I'm still waiting on the round sink to arrive, then I'll finish the sink base install.

I had enough 1/4" Cherry plywood to use for the doors, so I decide to use a flat panel vs a raised panel for these six doors. I used the same style and rail method of door building as the master cabin. Using the flat panels shaved quite a few hours off of the door construction while helping preserve my stock of air dried lumber.

This room, along with the master cabin, are as finished as they are going to get for right now. Once I've got the boat at the launch site, I'll give all the wood one more coat of Urethane. I've still got quite a bit of work to do and it makes no sense to me to spend my time putting any more urethane on the wood as it's going to get banged up. There's enough protection on everything to get it through the rest of the build.

I'm going to start on the kids cabins sometime next week. I'm feeling confident that I'll get all the cabin wood work finished this Spring.

Saturday, January 29, 2011

Guest cabin dressing room


The basic layout of the cabin area below is as follows: Down four steps from the salon above. Once at the bottom of the steps, you can either turn left through a door and get to the master cabin, or go straight through another door to get to the guest cabin dressing room/hallway. One has to go through this area to get to the guest cabin/kids cabin located in the forward area of the hull. Each cabin has a door to access the common bathroom where the shower and toilet is located. Each cabin ( master and guest) has it's own sink. The engine room is accessed from the master cabin through a water tight steel door.

Standing in the guest cabin dressing room, one will find a large sink base with storage underneath, four wall mounted cabinets, and a bench seat with storage underneath it. There will be two ceiling mounted DC lights, and one ceiling mounted AC light with all lights being controlled by switches on the wall. There is also a decent amount of wall space available to have some hanging storage without impacting ones ability to walk through the space.

Because of my wish filled thinking regarding shower sump pumps, I had to re think how I was going to hold the gray water from the shower and cabin sinks. I decided to add a holding tank, and the most logical place for it was under one of the bunks against the dressing room bulkhead. I was going to buy a plastic tank, but since I had enough stainless plate left over from the water tank construction I decided to fabricate my own and save some cash. The tank ended up with 47 gallons of capacity.


Under the sink base in the dressing room is some of the gray water plumbing. The through hull fitting you see is above the water line. When we have to hold our gray water, the blue valve will be shut and the black valve will be open. This will direct the water to the main sump which will then direct the water to the 47 gallon holding tank I just built. When we can discharge gray water, the blue valve will be open, the black valve will be closed, and the shower sump will discharge overboard via the black pipe when the sump selector valve is in that mode. It's a pretty simple set up albeit a bit on the bulky side, but I made everything from parts found in the shop and did not have to depart with any cash. The elbow on he end of the manifold is for the guest cabin dressing room sink once I get that sink installed.

I built four more cabinets to fill up the wall in this room, and stopped them well short of the port light. One of the cabinets will be the medicine cabinet above the sink, while the other three will be general storage. The cabinets are 12 inches deep at the base, and about 18" deep at the top. I'm also using these cabinets as the chase for the air conditioning duct that will feed the guest/kids cabin. That duct will be a four inch flexible pipe.

In order to give one as much privacy as possible, there will be a door between the dressing room and the bunk room. The door will be 20" wide.

I had enough room to create a bench in the dressing room so people could sit down while they were getting dressed. I installed a piano hinge on the lid of the bench so the bench could double as a locker for more storage.

The room is a fuzz narrow, but I'm able to easily navigate through it without bumping my knees or having to turn the least bit sideways. I think this space will be an important part of the boat in regard to helping all on board with privacy, and a sense of having ones own space. To be honest, this is a very comfortable room even though it's function is mostly utilitarian.

I have six doors to build for this room, and one more sheet of plywood to install on the partition between the master cabin and this space. I also have to plug all the screw holes, sand everything, and get a coat or two of finish on the wood. Once those jobs are finished, I'm ready to start work on the sleeping room and its four bunks. Once the doors are installed and some finish on the wood, I'll post some more pics.

Sunday, January 16, 2011

Anchor Winch


Wood working continues in other parts of the boat, but I thought I'd blog a bit about the anchor winch.

I'd always intended on using a chain windlass to handle my anchor, but this used winch was available, so I made the switch to a deck winch. This type of winch is a pretty simple piece of equipment with very few working parts which should provide me with a reliable tool to handle the ground tackle. As you can tell, this is a used winch, but given the simple nature of the beast, it will not take much to go through it. Once I'm done with the wood working, I'll do a re build on this winch.

The valving on this winch lets me power down, free spool, and power up. The line pull on the unit is 1500 lbs, which is adequate to handle my ground tackle.

I like the commercial, fish boat look of this winch, and I think it will look sharp on pulpit of my trawler. The winch is on the fence in terms of being just large enough for our boat. I spoke with the manufacturer, and they felt as if it would do the job. The line pull on the next two larger size models is the same, but the thickness of the metal base is more on the larger units, along with being able to handle more rode. This unit is cast aluminum, and the base plate ( the area where the winch bolts to my deck) thickness is 3/4". The manufacturer was concerned that a boat of my displacement might risk cracking the base plate if I were to get caught in a strong blow. He suggested that I use rope vs wire rope, and snub the anchor rode to a bit. The winch can handle 275' of 5/8" rope along with 40' of 3/8 chain leaving a 1" gap below the housing. I like to use a 5:1 scope when anchoring, and the amount of rode is at my minimum comfort level. I've never anchored in more than 40' of water, but you never know.

It's nice to be able to check another item off the list.

Monday, January 3, 2011

More Plumbing


I finished making all the plumbing connections for the cabins.

99% of the connections are under the sole in the bathroom. This space has turned into a busy area as it has passing through it four fill lines for the water tanks, the shower/sink pump sump, the water supply lines for the two sinks, the drain lines for the two sinks, the drain line for the shower, the "Y" valve for directing the sump discharge, the transport lines for the sump discharge, the 1 1/2" transport line for a possible future macerating type toilet, and the wiring for the sump. I made a valid attempt at keeping this space orderly, and if I had used some more fittings on the drain and discharge lines, I could have kept things really tight but I instead opted for less fittings and more flexible pipe.

I'm going to build the shower stall out of tile. Since I was working in this area, I decided to install the backer board for the tile, and the shower pan. Before I installed the backer board, I glued a closed cell foam gasket to the flange of the port light to stop condensation. Once the tile is installed along with the port light, I'll detail the gasket more so it will make more sense to anyone reading. As per a request from the three woman in the house, I built a ledge in the shower stall for a place to prop up a leg.

After making all the connections, I ran the shower sump to verify the flow rate. The shower sump is not going to have enough ass to move the shower water to my proposed gray water tank area ( the rear of the boat). I'm going to have to find another area for my gray water holding tank. The best place for this tank is going to be close to the overboard discharge point in the forward cabins. The tank will probably end up in the "V" up against the crash bulkhead @ station #1. I think I'll be able to fit a 40 gallon tank. My other choice is going to be under one of the kids bunks. The problem with going under the bunk, is that I'll eliminate a much needed storage cabinet.

I'm ready to sheath the bathroom, the dressing room/hallway, and part of the kids cabin. I'm going to have to hold off on sheathing the rest of the cabin until I get the gray water tank installed.


I'm going to use a composting toilet, but just in cast it does not perform, I installed a transport line for a future macerating style toilet. I plumbed this in with 1 1/2" sch. for pipe, using pressure fittings. I wanted to stay away from flexible pipe for this application so I had to use a few 45 degree fittings to get the pipe squared back up with the framing as it enters the bathroom area. This 1 1/2" line goes to the rear of the boat where I'll have a black water tank. The folks at Raritan assure me that their toilets can handle the lift and length of pipe just fine.

Sunday, December 19, 2010

Cabin Plumbing

The master cabin wood work is complete and before I can continue wood work in the rest of the lower hull, I had to get some plumbing issues worked in.

Each cabin has it's own sink. There is a common area shared by both cabins for the shower and toilet. The guest cabin has a bunk room, and a separate dressing area where the guest cabin sink resides. The time was now upon me to get all the water lines and drains lines installed for these areas.

For the shower I decided to do a build a conventional shower pan with cement and a pvc liner. I'll use tile as the finished shower floor. The shower drains to a shower sump, then the gray water will be directed either over board, or to a holding tank in the aft section. Since the sink in the master cabin is amid ship, and I did not want a through hull fitting ( I only have one below the water line through hull fitting on board) for the sink, I decided to share the master cabin sink share the shower sump. I plumbed the master cabin sink into the shower sump with 1" flexible PVC.

The guest cabin has it's own sink, and this sink discharges directly over board, or into the shower sump. The drain line for the guest cabin sink is also 1" flexible PVC.

I installed the shower valve in the head. I also installed the sink valve in the master cabin. The sink valve will be installed in the guest cabin once I have the wood work completed in that area.


The biggest decision I had to make was how to run the 1/2" water lines for all these devices. I had the choice to either run one hot and one cold from the water pump and have a forest of "T"
fittings under the sole, have each fixture be fed from a central manifold that distributed the hot and cold. I chose to have a central manifold to supply the boat. Having a bunch of "T" fittings did little to give me a warm fuzzy feeling on future maintenance of the boat, and the manifold just made good sense. The hot and cold manifold will be in the lazzerette area of the boat, and will make maintenance and winterizing a breeze. If I choose to expand the water system, I'll do so from this manifold. Since I'll have an air compressor on board, winterizing will be just a matter of opening manifold valves, and blowing all the lines out from one location.

I ran all the water lines in one bundle down the port side of the boat. I had drilled a two inch hole through the galley frames, and installed rubber grommets in the holes to protect the water lines. The rest of the path for the water lines ran through a chase I had created with cabinets and a little framing. The framed chase is easily accessed through the cabinets, or by removing a panel in the master cabin. The framed chase also houses some electric conduit, the water port side water tanks vent lines manifold, the hydraulic lines for the steering system, and more than likely, the hydraulic lines for leading the the wheel house. A pretty busy chase to say the least. The starboard side of the boat has a similar chase that houses the air conditioning feed for the cabins, the toilet waste transport line( if I decide to use a pump model), and some electric conduit.

Since I wanted fill the two inch grommets in the frames, I decided to include the wash down line for the anchor area ( one 1/2" line ), and I also had enough room to include a 1/2" line that will supply compressed air to the wheel house. I'll probably "T" off of this air line in the wheel house and run air to the wash down pump area. When ever I have to get into the area under the bow pulpit, I'll use an impact wrench to remove the 15 or so bolts holding the on the cover plate.


I'm leaning towards installing a composting toilet so I installed an 1 1/2" vent line for that type of toilet. I also have a 1 1/2" sch. 40 line installed to transport waste to a black water tank if I decide to use a macerating type toilet.


Since I had the master cabin sink valves installed I wanted to see how the sink fixture looked installed. Because I was scrounging for every available inch in the master cabin, it made more sense to have the sink valve mounted on the wall vs mounted on the sink top. I've never seen that type of valve before, and I'm real happy with how it looks. I also like the look of the under mount sink. In regard to the under mount sink, there was quite a bit more size choice's in a bar style vs a vanity style as long as one can live with the bar size sink strainer ( I'm one of those folks who can live with bar style sink strainer).