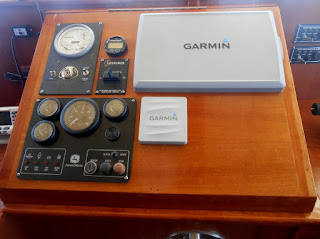
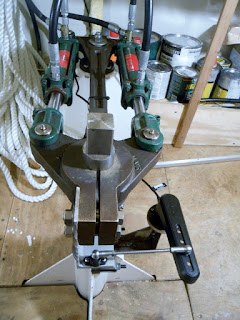
 All who have been on board are amazed at how straight the boat tracks, and how easy it is to operate the wheel. It's three turns of the wheel hard over to hard over.
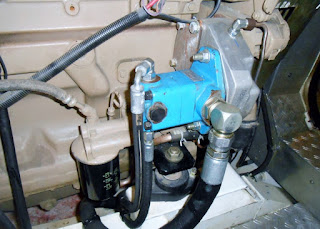
The auto pilot interfaces with the hydraulic steering system via a solenoid valve which directs oil to either the starboard or port cylinder.
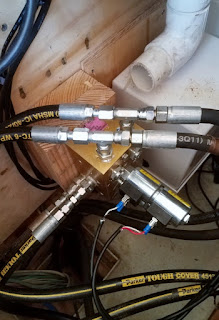 Before adding the solenoid valve, the oil had an easy path to and from the reservoir and the heat created was minimal. Once I added the solenoid valve and it's complicated path of oil flow, more friction was created, and the oil heated up.
 On a two hour commissioning of the auto pilot, I saw the oil temperature creep up to almost 160, which is 20 degrees warmer than the 140 degrees MHE recommends for this system.
Our boat is keel cooled and dry exhaust with an operating temperature of 185 degrees...give or take which makes the keel cooling circuit too hot for the steering oil. Because we have no raw water pump bringing cooling water on board, I had to come up with a way to add a pump.
The auxiliary drive adapter on our Deere 6068TFM engine is usually used to power the raw water pump, but because we don't need a raw water pump, I used the auxiliary drive adapter to power the hydraulic steering pump. Talking to our local Deere dealer, I asked the parts guy to look into adding a pump to the front of the engine, and powering it off of the serpentine belt.
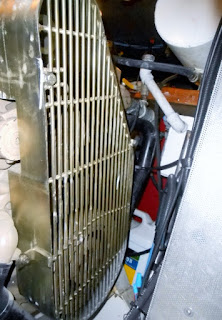
While waiting to hear back from a couple of vendors, I added a two inch pipe in a pipe cooler into the return oil circuit right before it entered the oil filter that was mounted on the oil reservoir. Already having a cooler in my spare part inventory, this was no big deal of a job, and costs only a trip to the hydraulic shop to re work one line and fabricate a small line along with a couple of new fittings. Having the pipe in a pipe cooler plumbed into the system, and not leaking, I began to get some feedback from a the vendors I contacted. The Deere dealer told me Deere had no option for adding a pump to the front of the engine, and anything I added would have to be a one of fabrication by myself. Fabricating a bracket was going to be a lot of work, and would require me hacking on the good looking belt guard Deere had on the front of the engine. Gregg at Washington Marine, sent me a picture of a pump sticking out of belt guard installation that looked pretty good, so I called the guy to inquire about the install. He was very familiar with the engine, and had fabricated many add on pumps for 6068's. The problem was that the newer PowerTech, which is what I have, is not set up to do a pump this way. He told me the only way to get a pump on the front of this engine was to have a pulley fabricated to bolt to the harmonic balancer...which put me back into cutting on the belt guard, adding a bracket, and a whole lot of work.
 With buying the pump, hiring a machine shop, 40 or 60 hours of my time, parts, yada yada yada, I was going to have well over a boat buck in this alternative, and probably closer to two boat bucks ( a boat buck is $1,000,00 ). Even though I don't have a proper shop anymore, I feel confident in my fabricating skills, but no matter what I did, this job was always going to look like an after though.
Adding an electric pump came to mind, but this option turned me off big time, and would always be my last resort.
I began to think about finishing the hydraulic system which will power the bow thruster and anchor winch ( this system is still a pile of parts ). By finishing ( starting ) the hydraulic system, I could add another circuit and use a hydraulic motor to drive a cooling pump. This is for sure a viable option as it would be reliable and robust....my guiding philosophy. The only problem is getting the hydraulic system up and running is going to require a few boat bucks, and quite a bit of time. The boat bucks are always a concern, but time was the real enemy as I'm taking the boat to Key West in early April, and time is getting tight.
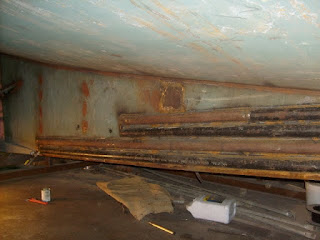
A temporary electric pump is starting to look like a reasonable option, so I started researching those pumps. One afternoon while cleaning up the bilge and checking the newly reconfigured hydraulic lines for leaks, I noticed two 1" couplings welded into the bottom of the hull about 10 inches away from where the hydraulic lines pass through the water tight engine room bulkhead. The couplings were capped off with threaded plugs, and I quickly remembered I had welded a keel cooler to the starboard side of the keel for cooling the lower air conditioner. The cooler I welded to the keel was 2" pipe I'd split in half. Smiling from ear to ear, I quickly grabbed some pliers to remove the plugs, which turned out to only be finger tight, and was now looking down into the dry galley of an unused cooler....problem solved.
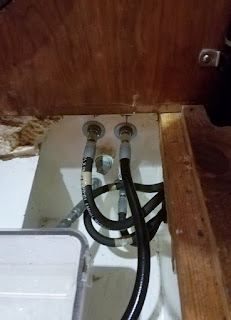
The first thing I did to commission this cooler was to connect the shop vac to one coupling and let it run for ten minutes. After ten minutes of running and looking in the vac bucket, there was a slight sign of moisture on the sides of the vac bucket. I turned on the vac again and sprayed a can of brake clean into the open port so the vac could suck the brake clean through the cooler. The brake clean would evaporate any moisture in the cooler. My next step was to fill the cooler with oil, so I turned to my trusty $25 harbor freight utility pump and sucked oil into the cooler. Using a pump to pull fluid into any fixture is really the best way to do it as it guarantees all air is removed. I decided to let the pump run for about 1/2 of an hour and used a cloth filter to catch any debris. After a thorough running, I made another trip to the hydraulic shop for a few fittings, and new line, and as easy as that I had the cooler plumbed into the system.
The cooler is in the return circuit which goes through a filter before it returns to the reservoir. I decide to change the filter before I started the engine, and along with replacing the filter, I purchased three spares for the spare part cabinet.
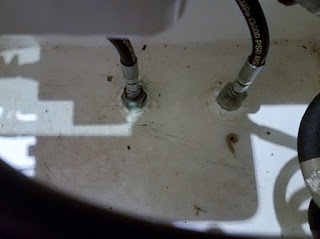
The cooler took about three gallons to fill, and along with the nine gallon reservoir, we have about 12 gallons of oil in the system. The 12 gallon volume alone should be enough to keep the oil cool, but now we have a bullet proof system with no auxiliary pump which will guarantee cooled oil with zero chance of failure of the cooling system.
Along with having spent almost no money on getting this job done and having something so bullet proof and reliable, this is one of those jobs that has me pumped up and patting myself on the back. Being able to install it and forget about it on a boat is such a big thing especially as something as important as oil cooling. Now I'm thinking about holding off on starting the hydraulic system install until I can haul out and weld another cooler on the other side of the keel for the hydraulic system.
Cheers
