Each cabin has it's own sink. There is a common area shared by both cabins for the shower and toilet. The guest cabin has a b
 unk room, and a separate dressing area where the guest cabin sink resides. The time was now upon me to get all the water lines and drains lines installed for these areas.
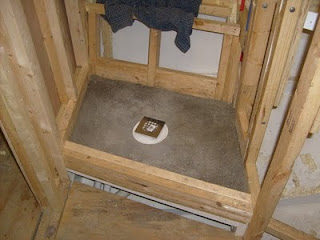
For the shower I decided to do a build a conventional shower pan with cement and a pvc liner. I'll use tile as the finished shower floor. T
 he shower drains to a shower sump, then the gray water will be directed either over board, or to a holding tank in the aft section. Since the sink in the master cabin is amid ship, and I did not want a through hull fitting ( I only have one below the water line through hull fitting on board) for the sink, I decided to share the master cabin sink share the shower sump. I plumbed the master cabin sink into the shower sump with 1" flexible PVC.
The guest cabin has it's own sink, and this sink discharges directly over board, or into the shower sump. The drain line for the guest cabin sink is also 1" flexible PVC.

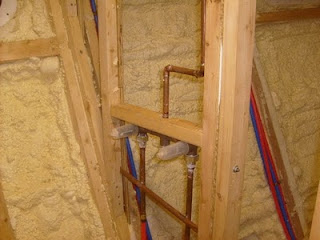
I installed the shower valve in the head. I also installed the sink valve in the master cabin. The sink valve will be installed in the guest cabin once I have the wood work completed in that area.
The biggest decision I had to make was how to run the 1/2" water lines for all these devices. I had the choice to either run one hot and one cold from the water pump and have a forest of "T"
fittings under the sole, have each fixture be fed from a central manifold that distributed the hot and cold. I chose to have a central manifold to supply the boat. Having a bunch of "T" fittings did little to give me a warm fuzzy feeling on future maintenance of the boat, and the manifold just made good sense. The hot and cold manifold will be in the lazzerette area of the boat, and will make maintenance and winterizing a breeze. If I choose to expand the water s
 ystem, I'll do so from this manifold. Since I'll have an air compressor on board, winterizing will be just a matter of opening manifold valves, and blowing all the lines out from one location.
I ran all the water lines in one bundle down the port side of the boat. I had drilled a two inch hole through the galley frames, and installed rubber grommets in the holes to protect the water lines. The rest of the path for the water lines ran through a chase I had created with cabinets and a little framing. The framed chase is easily accessed through the cabinets, or by removing a panel in the master cabin. The framed chase also houses some electric conduit, the water port side water tanks vent lines manifold, the hydraulic lines for the steering system, and more than likely, the hydraulic lines for leading the the wheel house. A pretty busy chase to say the least. The starboard side of the boat has a similar chase that houses the air conditioning feed for the cabins, the toilet waste transport line( if I decide to use a pump model), and some electric conduit.
Since I wanted fill the two inch grommets in the frames, I decided to include the wash down line for the anchor area ( one 1/2" line ), and I also had enough room to include a 1/2" line that will supply compressed air to the wheel house. I'll probably "T" off of this air line in the wheel house and run air to the wash down pump area. When ever I have to get into the area under the bow pulpit, I'll use an impact wrench to remove the 15 or so bolts holding the on the cover plate.
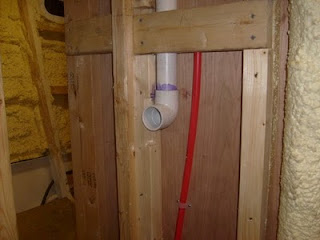
I'm leaning towards installing a composting toilet so I installed an 1 1/2" vent line for that type of toilet. I also have a 1 1/2" sch. 40
 line installed to transport waste to a black water tank if I decide to use a macerating type toilet.
Since I had the master cabin sink valves installed I wanted to see how the sink fixture looked installed. Because I was scrounging for every available inch in the master cabin, it made more sense to have the sink valve mounted on the
 wall vs mounted on the sink top. I've never seen that type of valve before, and I'm real happy with how it looks. I also like the look of the under mount sink. In regard to the under mount sink, there was quite a bit more size choice's in a bar style vs a vanity style as long as one can live with the bar size sink strainer ( I'm one of those folks who can live with bar style sink strainer).
