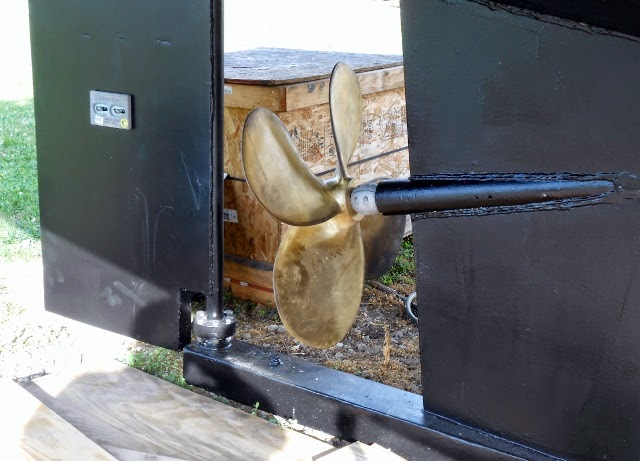
.jpg) She's able to be launched, but a situation with my 81 year old mother found Shannon, my sister, and myself pulling together to help mom, and less important things had to be shelved. Anyway, a launch is imminent, but it will be later in July, or early August.
She's able to be launched, but a situation with my 81 year old mother found Shannon, my sister, and myself pulling together to help mom, and less important things had to be shelved. Anyway, a launch is imminent, but it will be later in July, or early August.Boat building is still moving forward. With the devil being in the details, I'm at the stage where getting things completely finished is high on my list. I'm putting to bed quite a bit of work hoping to not have to re-visit these projects again. I'm actually to the point where I can start to think about hauling some left over construction material off of the boat.
I had to dig the welder out of the forward cabin and make some brackets for the throttle and transmission shift cables. The correct length cables arrive at the boat early in the week, and I finalized the installation late in the week. Listening to Terry at Washington Marine was a prudent move on my part and having him order the correct length cables was worth it. The shift motion is firm and easy on the touch, and I'm happy with how well the throttle control is.
While I had the welder out, I made a bracket for mounting the air horns that will sit on the bill of the wheel house, and mounted the horns.
.jpg) The junk air solenoid valve that came with the horns did not work, so the only way to test the horns was to use the blow gun.
The junk air solenoid valve that came with the horns did not work, so the only way to test the horns was to use the blow gun.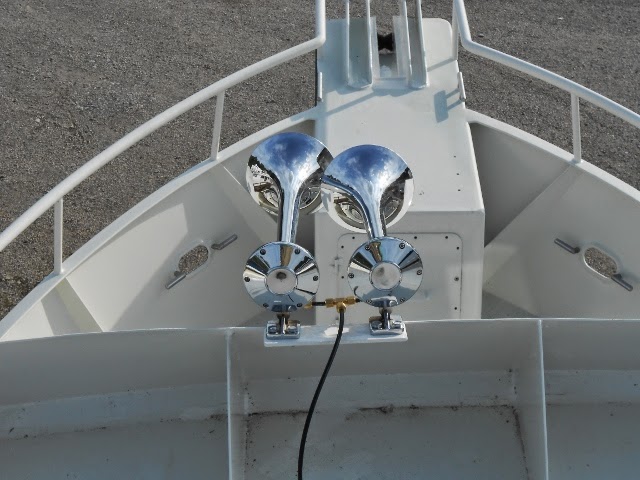.jpg) The horns work well, and the 170 decibel rating makes your ear sting if you're standing in front of them. A new solenoid switch is on the way.
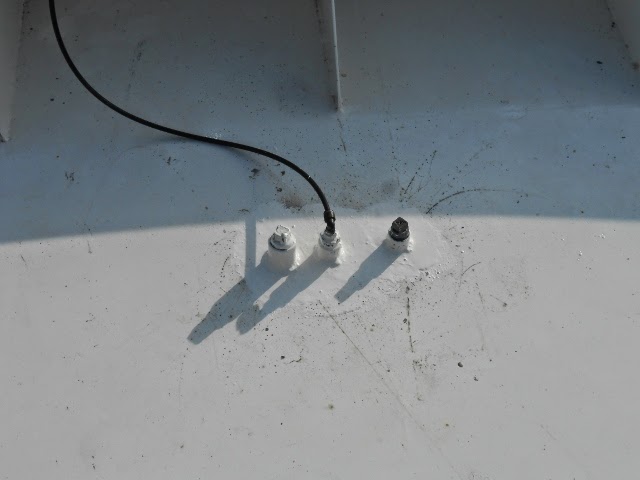
The horns work well, and the 170 decibel rating makes your ear sting if you're standing in front of them. A new solenoid switch is on the way.While I was welding on top of the wheel house, I welded in three couplings. One coupling for the air horns, one coupling for the VHF cable, and the last coupling for a search light.
All the anodes are bolted to the hull.
I decided to install a scoop strainer for the sea chest intake. I was afraid that without a scoop, there might be a tendency to suck the sea chest dry when we're under way. Instead of fooling around with welding a bunch of studs to the hull for the scoop, I welded one 1/2" stud, and used a isolator bushing to electrically disconnect the scoop from the hull.
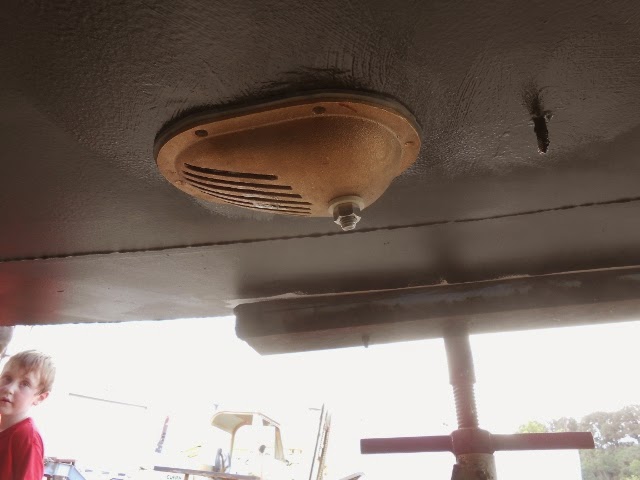.jpg) I also decided to add a small anode behind the scoop. With only one beefy stud pulling the scoop tight to the hull, a rubber gasket was also added to help tighten things up and keep the bronze off of the steel.
I also decided to add a small anode behind the scoop. With only one beefy stud pulling the scoop tight to the hull, a rubber gasket was also added to help tighten things up and keep the bronze off of the steel.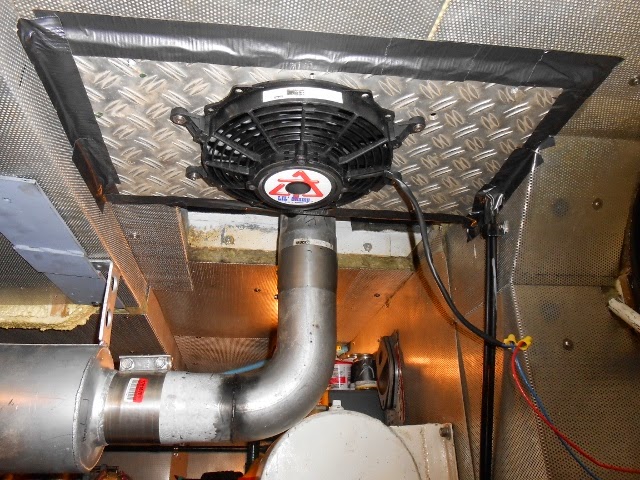.jpg) A big piece of the engine system is ventilation of the engine room. The engine room ventilation is done via a stack that exits up through the center of the boat and out the roof. The stack is 26" x 26", and is partitioned in the center crating two stacks with one for exhaust, and one for intake. Fans are going to have to be used as I don't think passive ventilation will work. Once the water tight engine room doors are closed, the room is now air tight with only the stack allowing air in or out. So, if I pull air in to the now pressurized engine room via a fan, the air now has no choice but to exit the engine room via the exhaust side of the stack, forcing out the hot engine room air. The key here, in my opinion is not letting the intake air to short circuit. For the short circuiting issue, I decided to create a shroud in the stack on the intake side, and mount the intake fan in a precisely cut hole in the shroud. The shroud was made using scrap aluminum left over from the scrap aluminum I used to sheath the engine room sole. The shroud is bolted in place so it's easy to remove or expand, and I mounted the fan using threaded rivets, so that too is easy to replace. I purchased two 9" axial fans from Delta T for ER ventilation. The quality of the fan is about as good as one could find with the fan having been built for specifically this application. So yesterday afternoon, I'm down in the 90 degree engine room ( remember summer has found us), building the shroud and installing the fan. I'm looking at this fan, and doubts are filling my mind. " I should have gone with the 11" fan". " There's now way this fan is going to do what I want it to do, it's to damn small". With the fan installed, I decided to energize it even though I did not have proper wires run from the wheel house. Using the hot wire for the ER lights outside the ER door in the master cabin, I powered up the fan. Man, was I surprised how much air that thing put's out, and how relatively quiet it is. The fan is supposed to be rated at 750 CFM, and the old head in front of the fan test tells me it's pushing out 754.
A big piece of the engine system is ventilation of the engine room. The engine room ventilation is done via a stack that exits up through the center of the boat and out the roof. The stack is 26" x 26", and is partitioned in the center crating two stacks with one for exhaust, and one for intake. Fans are going to have to be used as I don't think passive ventilation will work. Once the water tight engine room doors are closed, the room is now air tight with only the stack allowing air in or out. So, if I pull air in to the now pressurized engine room via a fan, the air now has no choice but to exit the engine room via the exhaust side of the stack, forcing out the hot engine room air. The key here, in my opinion is not letting the intake air to short circuit. For the short circuiting issue, I decided to create a shroud in the stack on the intake side, and mount the intake fan in a precisely cut hole in the shroud. The shroud was made using scrap aluminum left over from the scrap aluminum I used to sheath the engine room sole. The shroud is bolted in place so it's easy to remove or expand, and I mounted the fan using threaded rivets, so that too is easy to replace. I purchased two 9" axial fans from Delta T for ER ventilation. The quality of the fan is about as good as one could find with the fan having been built for specifically this application. So yesterday afternoon, I'm down in the 90 degree engine room ( remember summer has found us), building the shroud and installing the fan. I'm looking at this fan, and doubts are filling my mind. " I should have gone with the 11" fan". " There's now way this fan is going to do what I want it to do, it's to damn small". With the fan installed, I decided to energize it even though I did not have proper wires run from the wheel house. Using the hot wire for the ER lights outside the ER door in the master cabin, I powered up the fan. Man, was I surprised how much air that thing put's out, and how relatively quiet it is. The fan is supposed to be rated at 750 CFM, and the old head in front of the fan test tells me it's pushing out 754.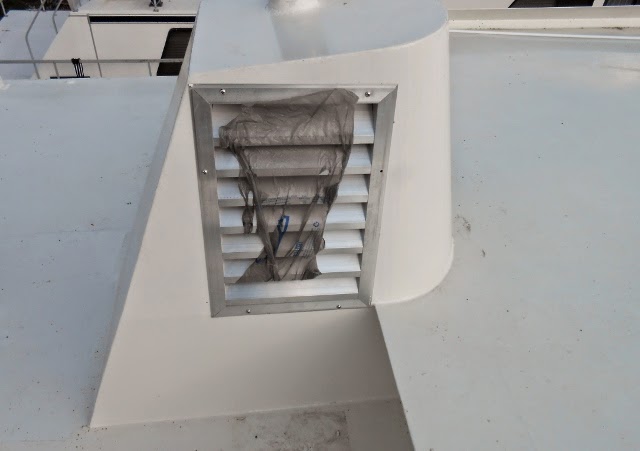.jpg) Because the temporary fan power wires are running from the master cabin through the ER water tight door, I could completely close the doors to the water tight position for fear of cutting the wires, so the door dogs were only about 1/4 engaged. The door was hitting the gasket, but not compressing it, and I could tell this by feeling how much air was short circuiting out the door... not a lot, but I could feel it. That all looks good, so lets go roof top and see what's happening at the stack funnel. Up on the roof, the first thing I noticed is that the fan seems louder up top. The second thing I noticed is how much air is pouring out the exhaust side of the stack. I could sort of feel air being pulled in on the stack's intake side, but it's difficult to feel with ones hand. Using a garbage bag, I placed it in front of the intake Louver, and the baggie was immediately sucked into the grill. If I did not get insect screens with the Louver, the baggie for sure would have been sucked down in to the stack and into the fan. The last thing I wanted to check was the amperage draw which I found to be 9 amps. Most times, a few small things together can add up to a large thing as to how things perform. "The devil's in the details" . While the shroud fits good, I decided to use some duct tape to seal up the edge of the shroud where it hits the ceiling.
Because the temporary fan power wires are running from the master cabin through the ER water tight door, I could completely close the doors to the water tight position for fear of cutting the wires, so the door dogs were only about 1/4 engaged. The door was hitting the gasket, but not compressing it, and I could tell this by feeling how much air was short circuiting out the door... not a lot, but I could feel it. That all looks good, so lets go roof top and see what's happening at the stack funnel. Up on the roof, the first thing I noticed is that the fan seems louder up top. The second thing I noticed is how much air is pouring out the exhaust side of the stack. I could sort of feel air being pulled in on the stack's intake side, but it's difficult to feel with ones hand. Using a garbage bag, I placed it in front of the intake Louver, and the baggie was immediately sucked into the grill. If I did not get insect screens with the Louver, the baggie for sure would have been sucked down in to the stack and into the fan. The last thing I wanted to check was the amperage draw which I found to be 9 amps. Most times, a few small things together can add up to a large thing as to how things perform. "The devil's in the details" . While the shroud fits good, I decided to use some duct tape to seal up the edge of the shroud where it hits the ceiling. As I said before, I bought two of these axial fans for the ER. The other fan I'm going to install in the aft corner, pushing air towards the work bench. Because of the amperage draw, I have to decide if I want to use two circuits or one. I'm inclined to use two circuits as I might be able to get by using only one fan. The intake fan is for sure going to be running 100% of the time the engine is running along with some time after the engine is stopped to help with cooling the engine room down. The pushing fan might not need run as much, and given that it will see less duty, it should last much longer. If this proves to be the case, the less run pushing fan will also double as a spare fan to be used to replace the intake fan for when it fails. The intake fan for sure has to run, so putting the fans on separate circuits gives me some redundancy.
.jpg)
.jpg)
The next step to finish ventilation project is to pull the wires and land them in the wheel house. While I'm pulling wires, I might as well pull wires for the fresh water pump along with the bilge pump switch's. I have six spare DC conduits installed from the wheel house to the ER, so this one wire pull will fill one of the conduits.
.jpg)
I might as well add that there's a solid day of cleaning for two people once we pick a launch date.... she's a dirty mess.
Cheers
.jpg)
+-+Copy.jpg)
.jpg)
.jpg)
.jpg)
.jpg)
.jpg)
.jpg)
.jpg)
.jpg)
.jpg)
.jpg)
.jpg)
